If your website has many pages, not all of them need to appear in the main navigation. You may wish to have your visitors navigate through other pages of your site to find related content. This tutorial is going to show you how to use the Page Manager function to improve the navigation of your website.
Step 1: Decide on your categories
The first step is to decide what your pages are going to be and how they are going to be grouped together. For the purpose of this exercise I am going to make a website about the "Dog Breeds of the World." My main page will be called "Dog Breeds." This page will link to pages with the different groupings of dog breeds. Finally I am going to have pages with individual breeds of dog within the group. This gives me three levels of navigation as follows:
Dog Breeds of the World
Groups of Dogs
The Breeds
Step 2: Create your pages
Create new pages by clicking on Page and then clicking on the green "+". Enter the name of your page and page heading.

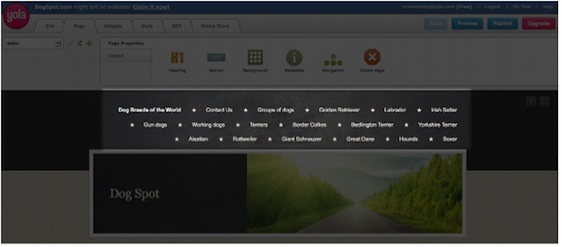
I am now going to create all the pages for my site. This website is going to have a total of 15 pages. Look how the navigation bar might look with all 15 pages - if I were really making a website about all the breeds of dog in the world it would have hundreds!
I think you will agree with me that this is not a pretty picture. It is also very confusing to your visitors, as they have no way of know what page to go to first! Something must be done...

Step 3: Use the Page Manager to organize your pages
To organize your pages in the navigation, do the following:
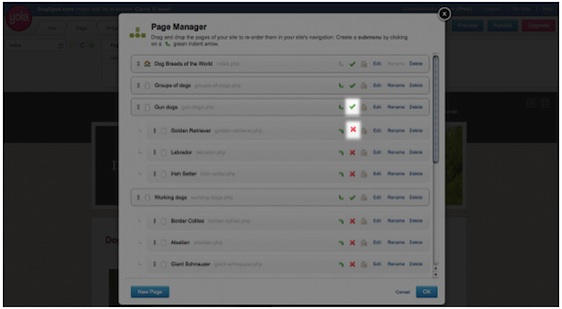
- On the top menu bar, click on Page > Navigation.
- Click on the green checkmark next to the page you'd like to remove from your navigation (it will become a red "X"). This hides the page from your navigation menu.
- Drag and drop your pages vertically to get them in the right order.
- Click "OK".

Now only my main page, "Dog Breeds of the World", is going to appear in my navigation.
Step 4: Create your links
The only step that remains is to create links between your pages. These are the steps:
- Click on the Widgets menu.
- Drag and drop a Text Widget onto your page.
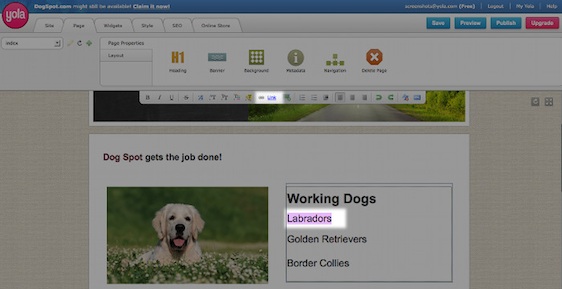
- Type and highlight your link text.
- Click "Link" button (looks like a chainlink with the word "Link" beside it) on the Text Editing Toolbar.
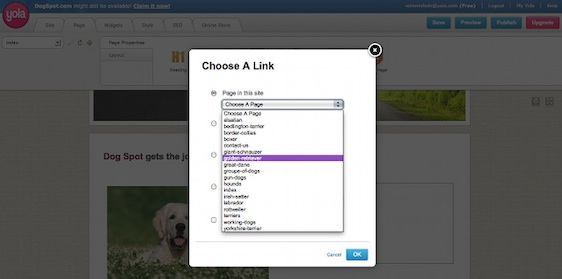
- In the Link Editor dialog box, browse for the page you want to link to and click "OK".


Do this for all the pages in your site. You will then have a well-organized site with a clear hierarchy that will help your visitors find the information they are looking for.
For more information please read our tutorial on Creating Links.
Comments
0 comments
Please sign in to leave a comment.